This tutorial is to show you how to make a rough BV (blocking volume) to obtain a smooth traveling on a rock surface. There is several ways of generating a BV from SM (static meshes). Still, when it come to geometry, the simpler the better. Many SM use a complex collision model (rocks in particular) & generating a BV from that kind of SM will generate a complex BV, which we don’t want. This is a trick I learn when I start mapping, it work well & is simple to do.
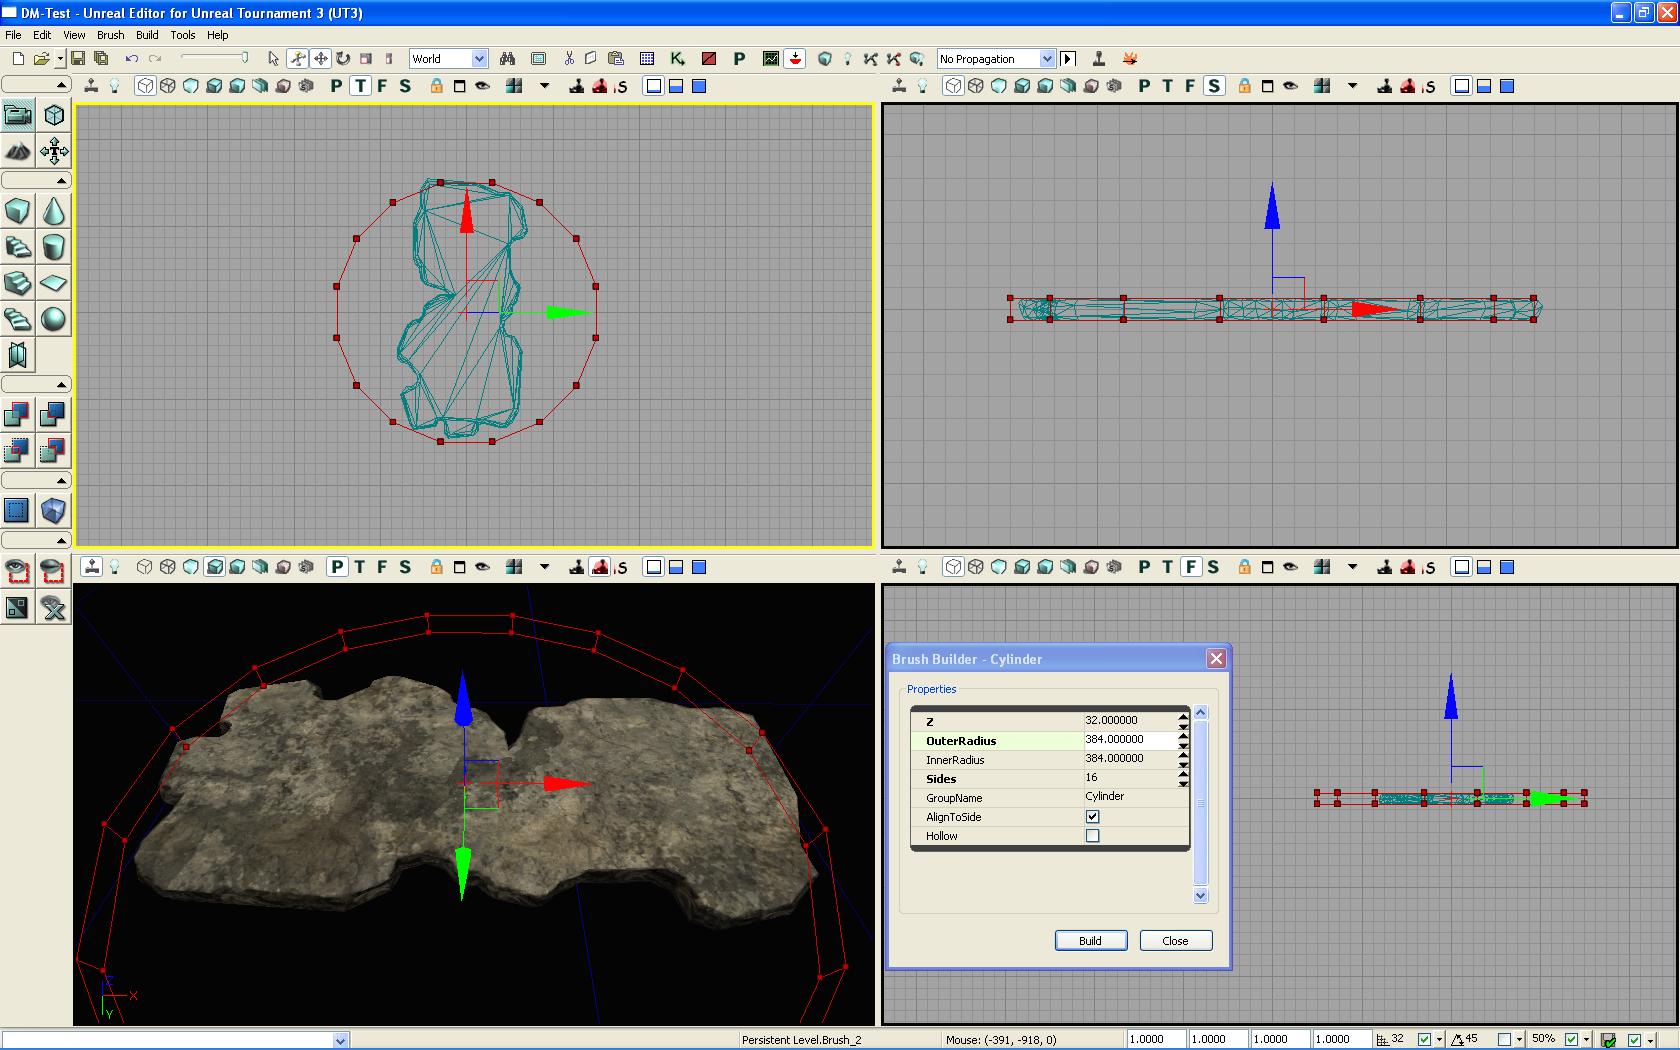
So, to begin with, for my example, I add this SM. Notice that I use a grid of 32 UU’s. The SM as a height of ±32 UU’s. After I click on the “Cylinder” icon & then select the brush builder. Another thing is that this SM is placed in my level inside a wall so there will be a straight line in the BV later that represent the wall.
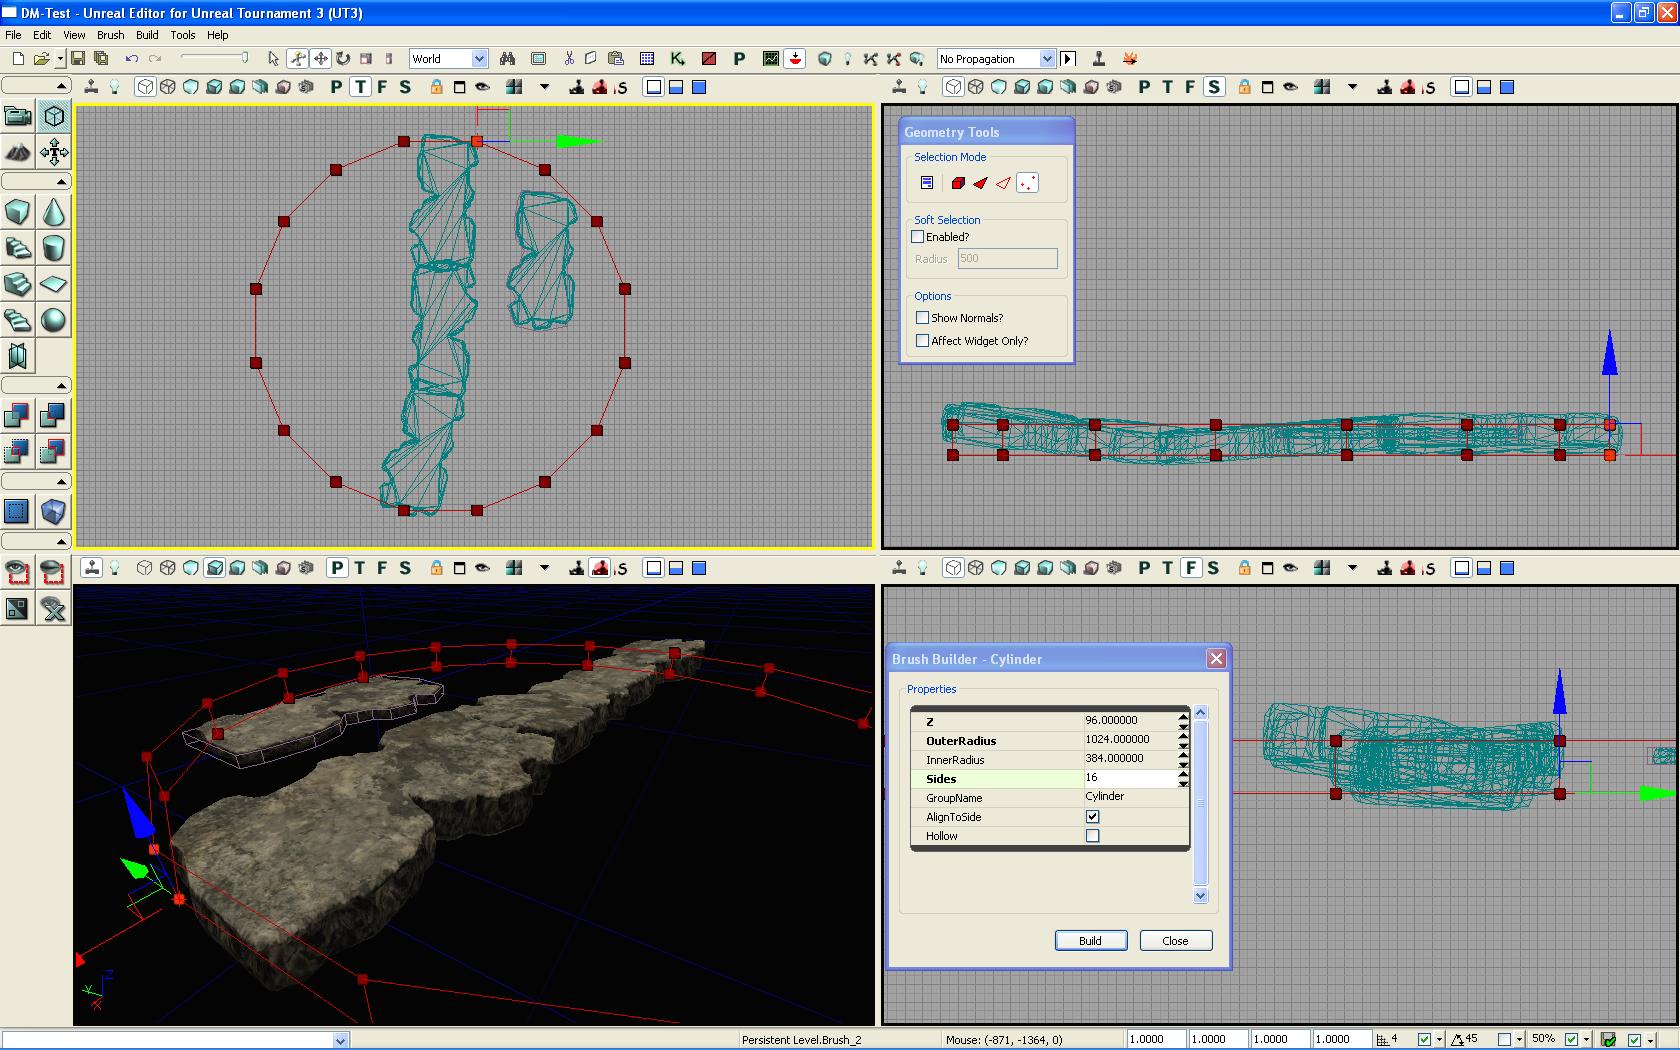
I change the brush builder properties as you can see to reflect the SM height, in this case, 32. The radius must cover the longest length part of the SM. I recommend using a multiple of 32 (128, 256, etc). I also use 16 sides, which I found to be a good value over time. The more you add sides, the more you can be precise but for my example, 16 is good enough for this SM :
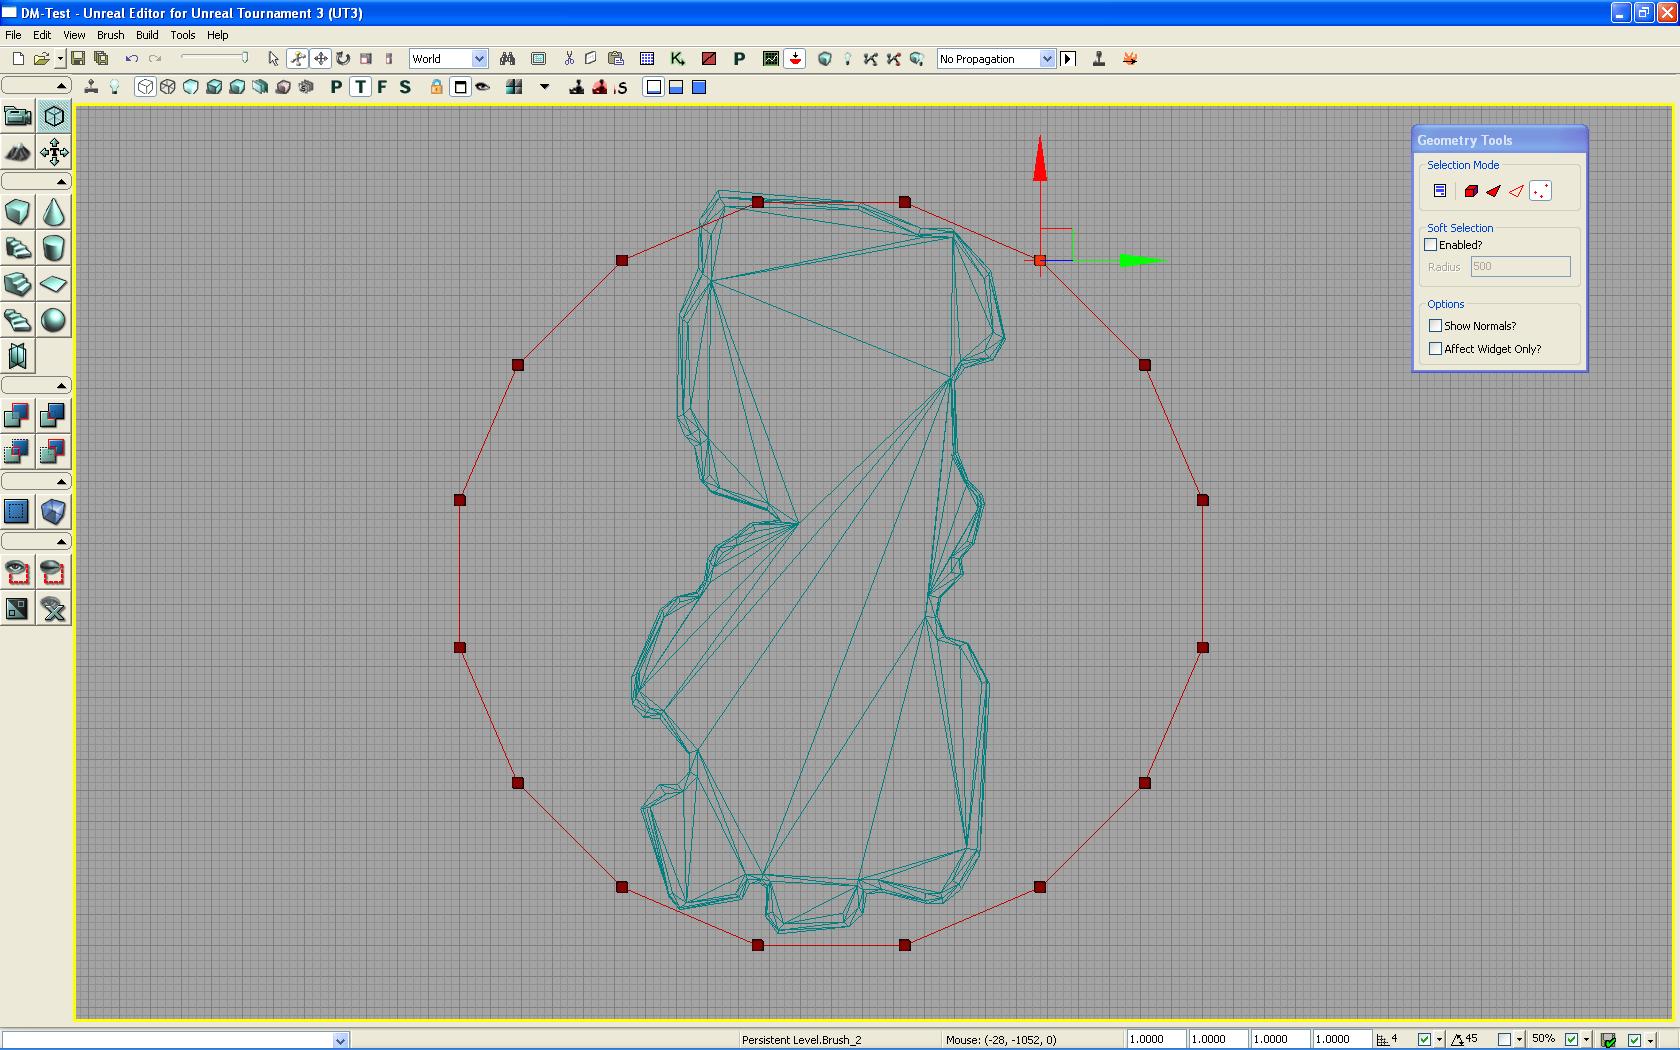
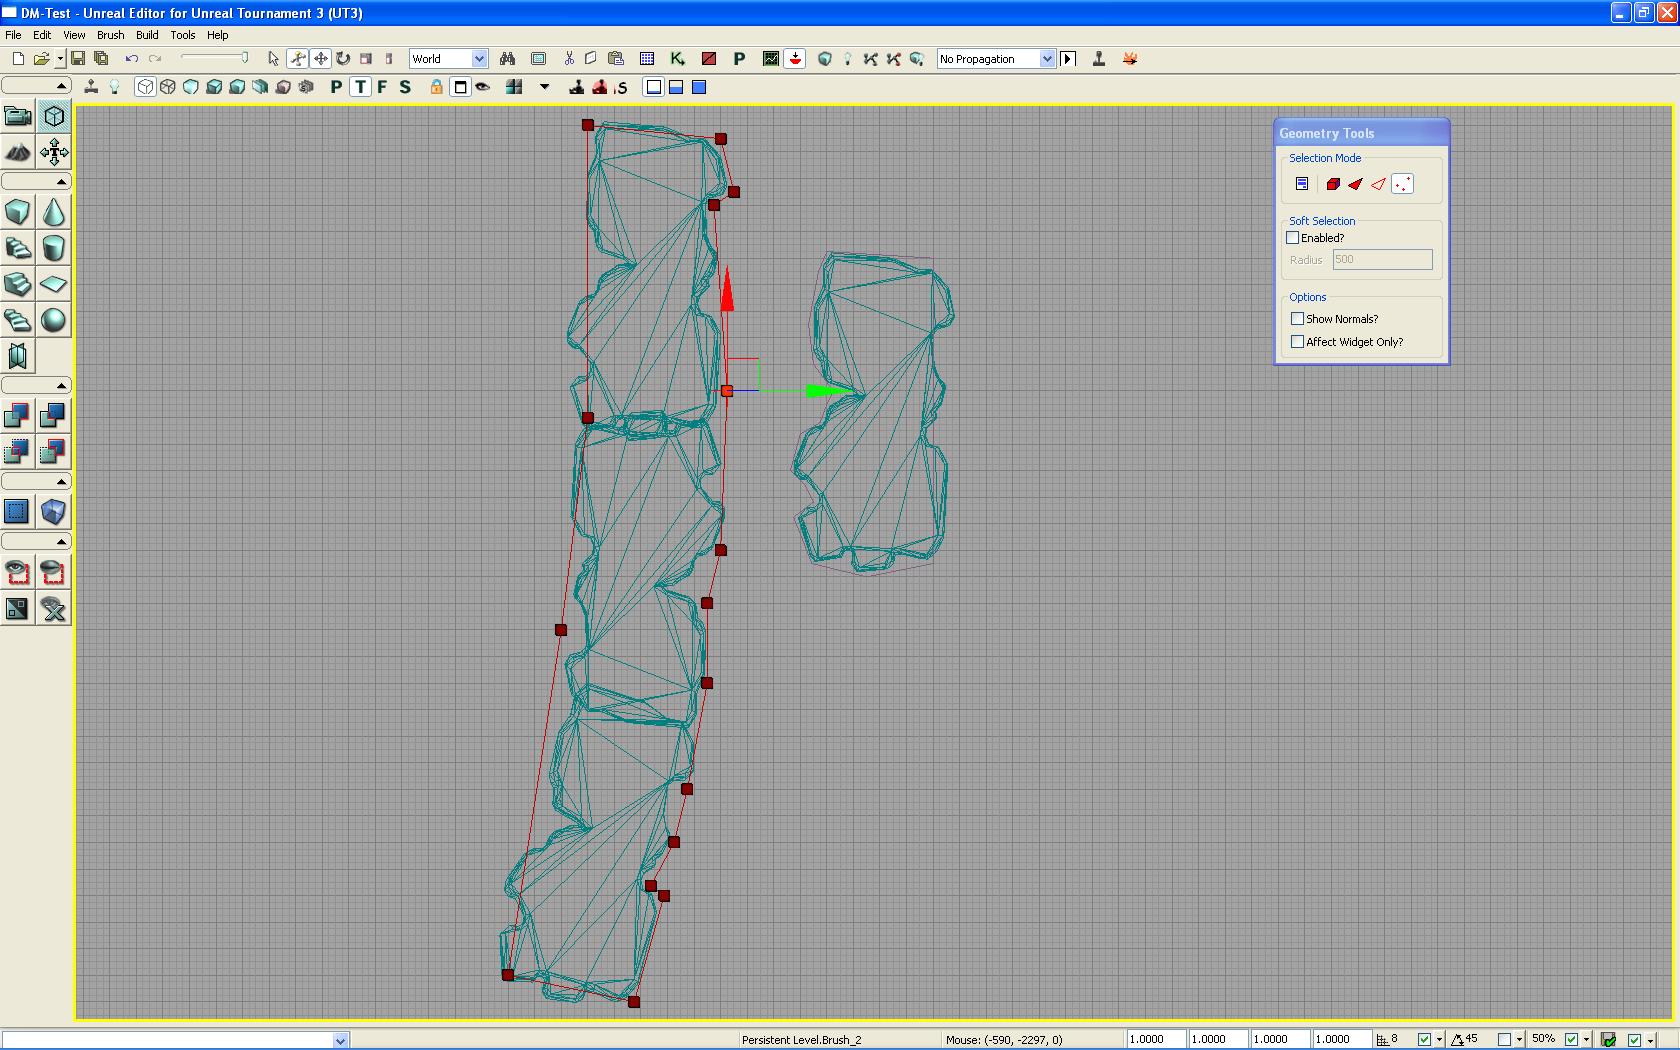
Once the cylinder cover your SM, use the top view & switch in full screen mode. At this stage, I strongly recommend you switch to a grid of 4 UU’s for a good vertex control (you can go to 1 if you like for the best accurate result). Now, use the geometry tool, click on every vertex of the cylinder with your right mouse button so all vertex will be automatically aligned to the grid like this. When done, by selecting the vertex, move than so they fit’s the SM shape & don’t forget to use 2 of them in straight line if you intent to place this kind of SM inside a wall 😉
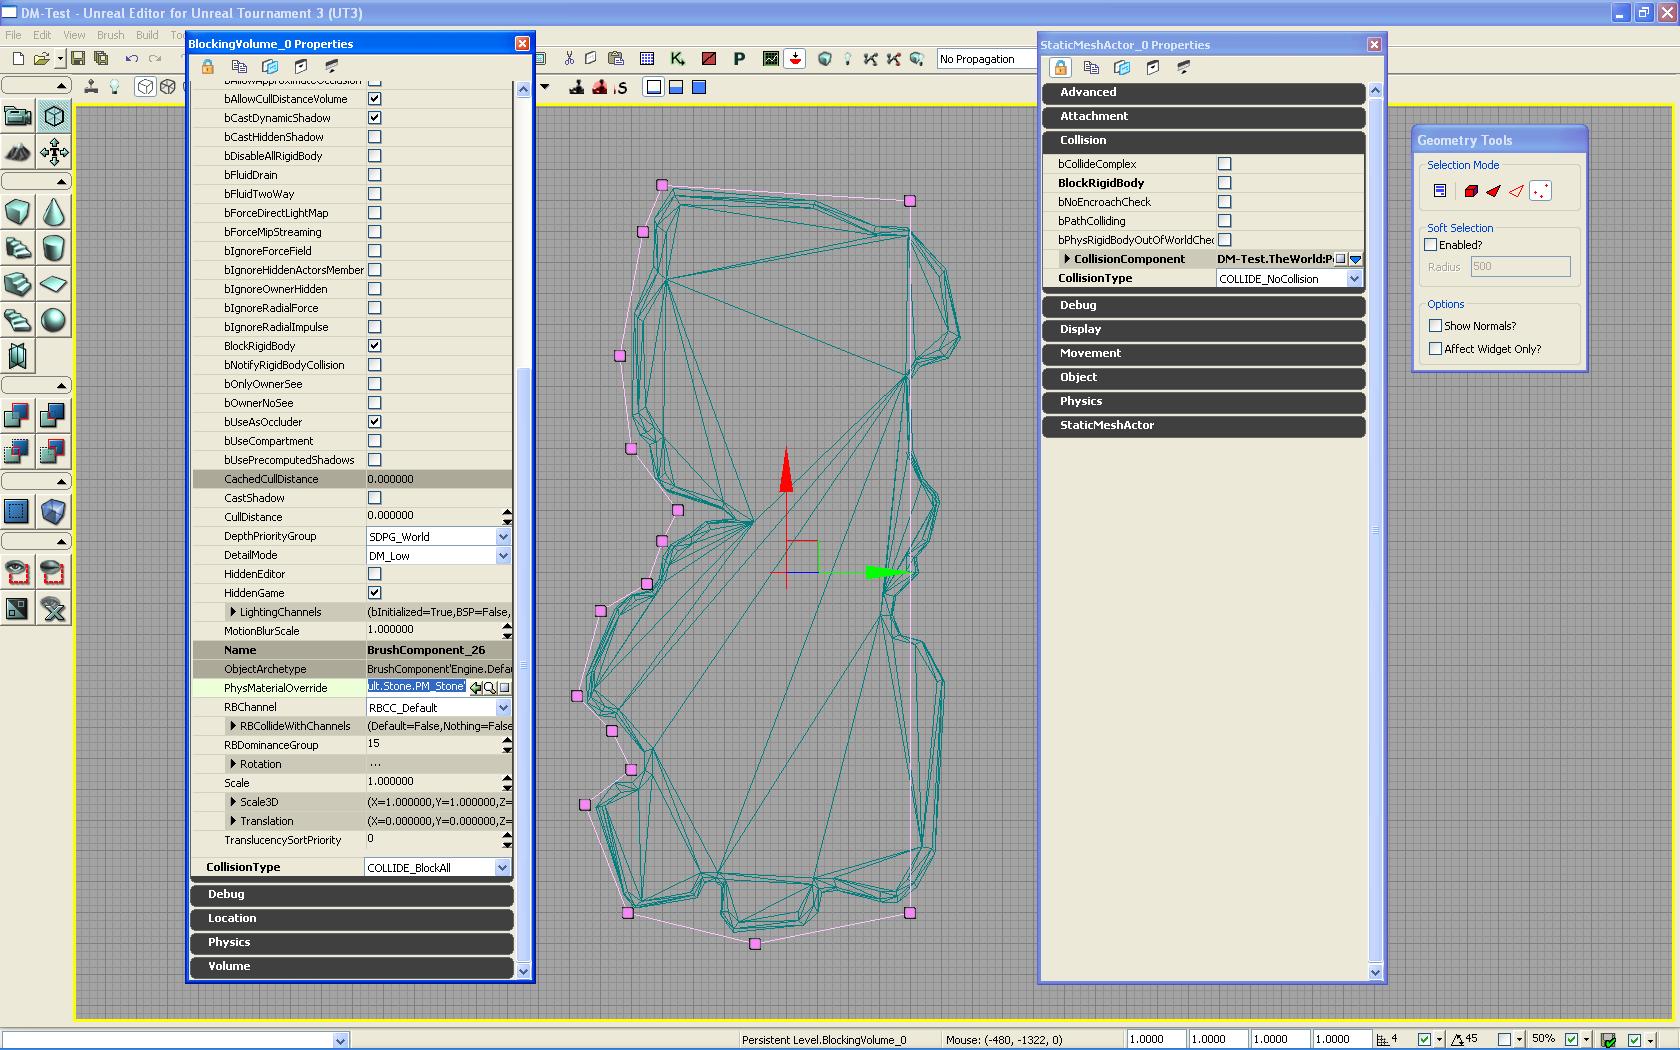
When the brush as the desired shape, generate the BV using the add volume icon with your right mouse button. In my case, see the straight line to the right that represent a wall, the other vertex are nicely aligned to the SM itself. Once the BV is made, hit F4 to bring up the BV properties, in the collision menu, assign a proper sound to your new volume (stone in this case) & select the CollisionType to Block all. In your SM properties, adjust the CollisionType to NoCollision.
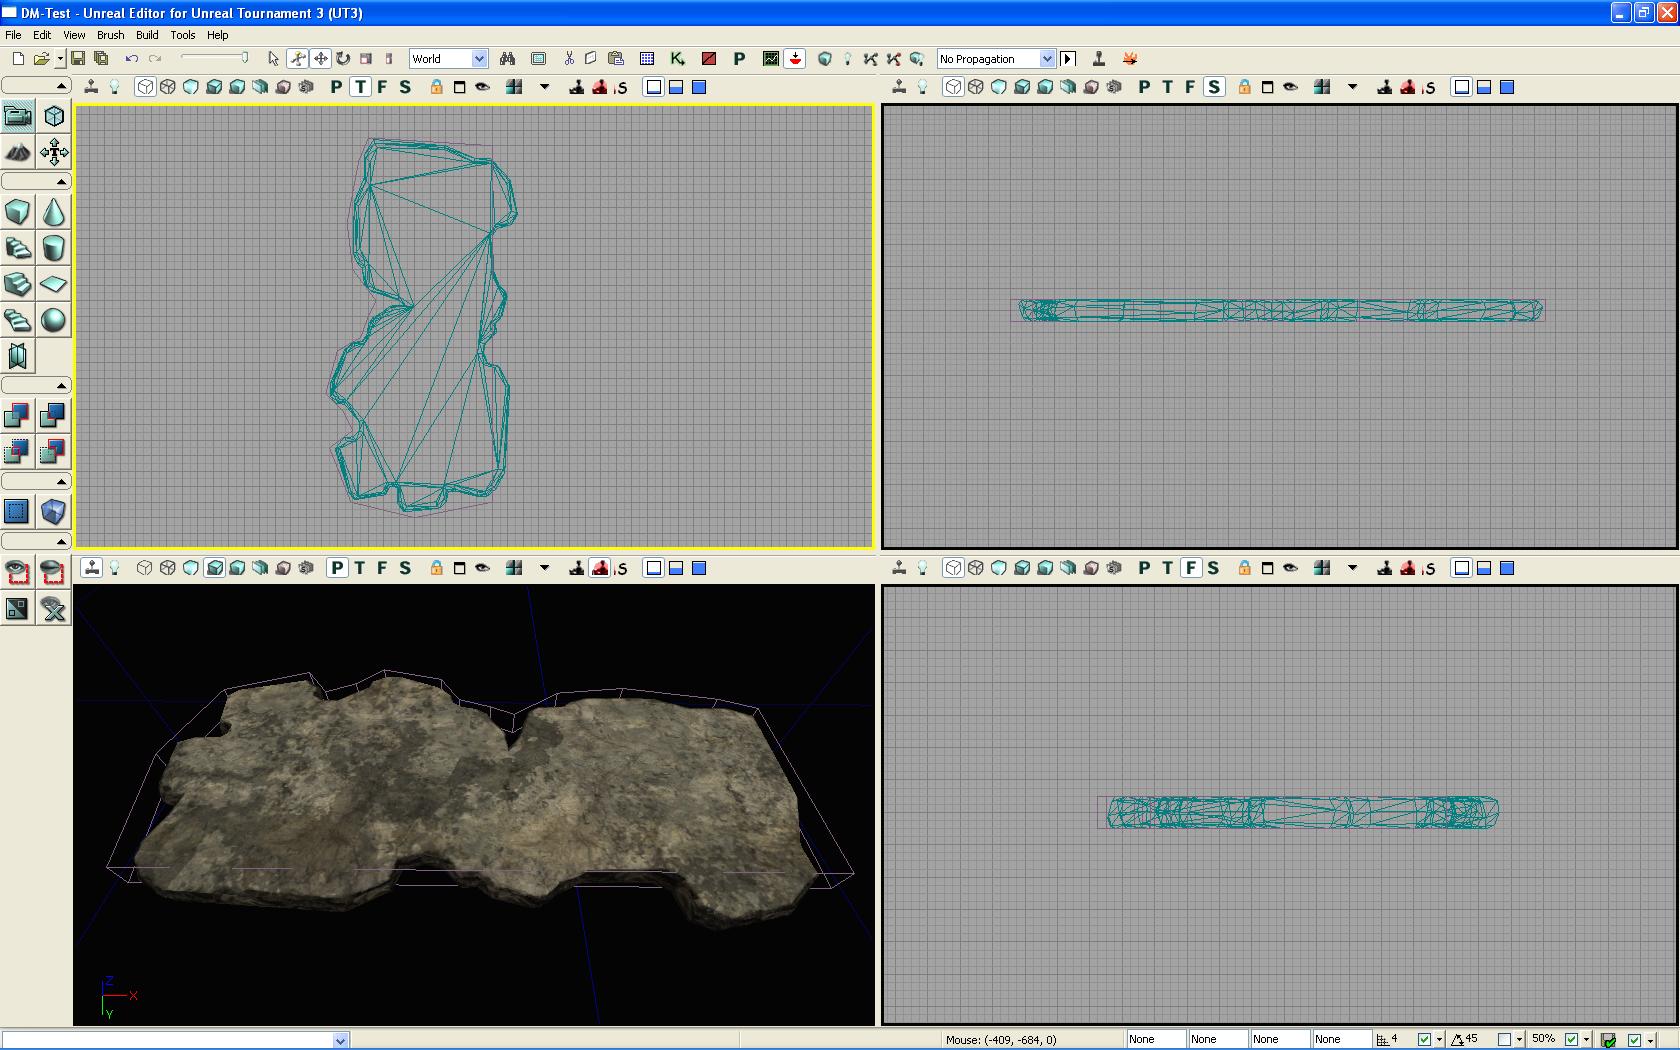
This is the final result :
Now, let say you have plenty of that SM in a row to simulate a walkable rocky section & want to build only 1 BV that cover them all ? For my example, I copy 3 of them raising the height by 3 & change there angle.
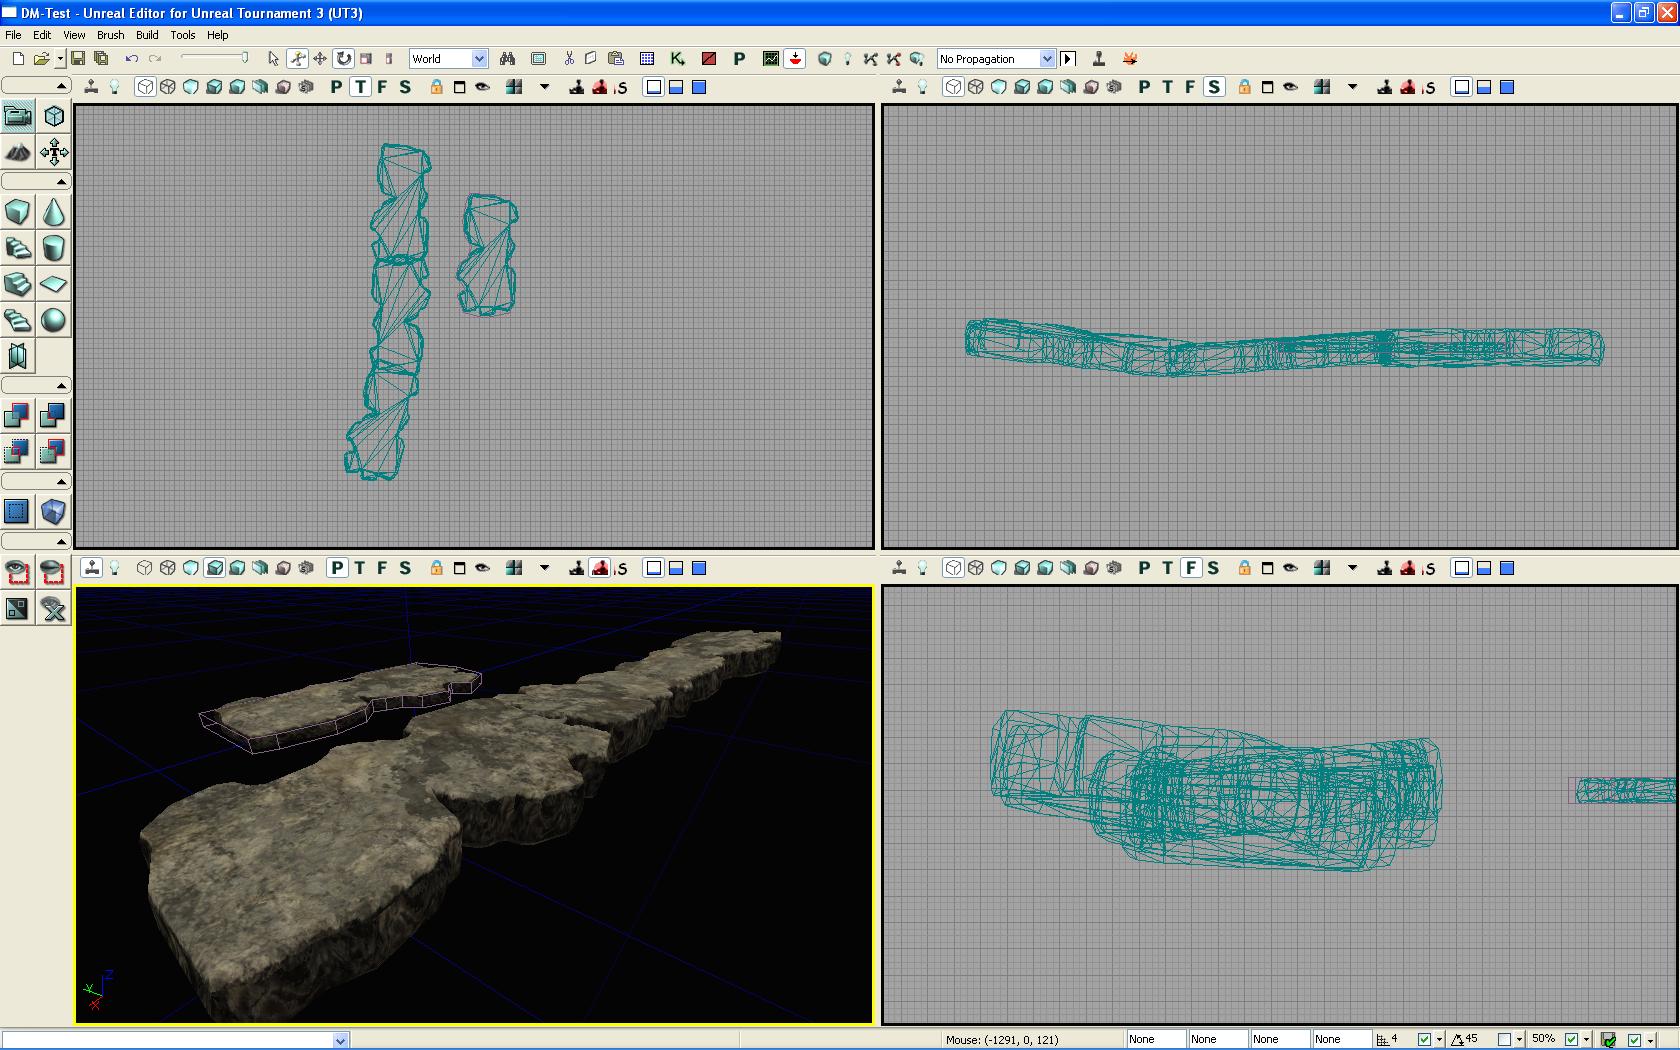
Simply select the SM that is located in the middle of the length & again, click on the “Cylinder” icon & then select the brush builder & adjust the height / length / number of side. Now, use the geometry tool, again, click on every vertex of the cylinder with your right mouse button so all vertex will be automatically aligned to the grid like this. When done, by selecting the vertex, move them so they fit’s the SM shape. I still use 16 sides but I would recommend 24 or even more in this case :
This is how it look with only 16 sides. Don’t forget that the SM angle as changed so you will need to adjust the vertex upward / downward depending on the SM angle by using another view port. The top view is the best one to craft the shape of the BV, not the height. Once your done follow the same step as above (generate the BV, adjust collisions / sound accordingly & remove collisions on the SM).
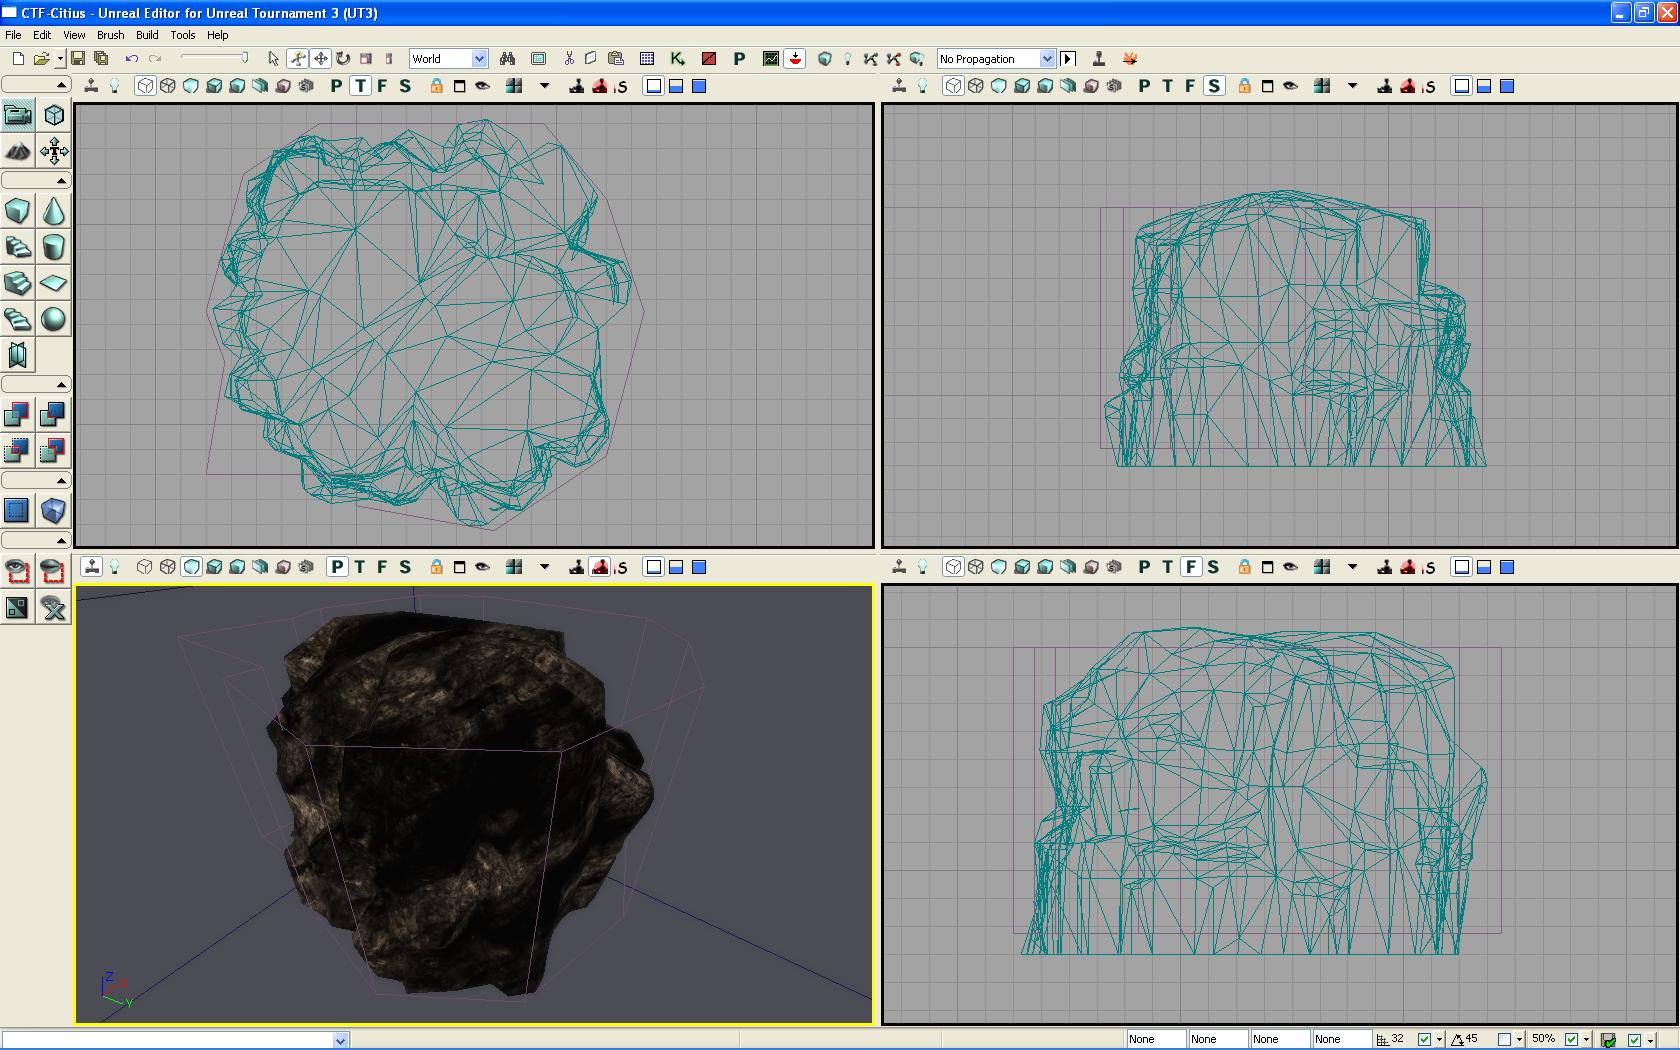
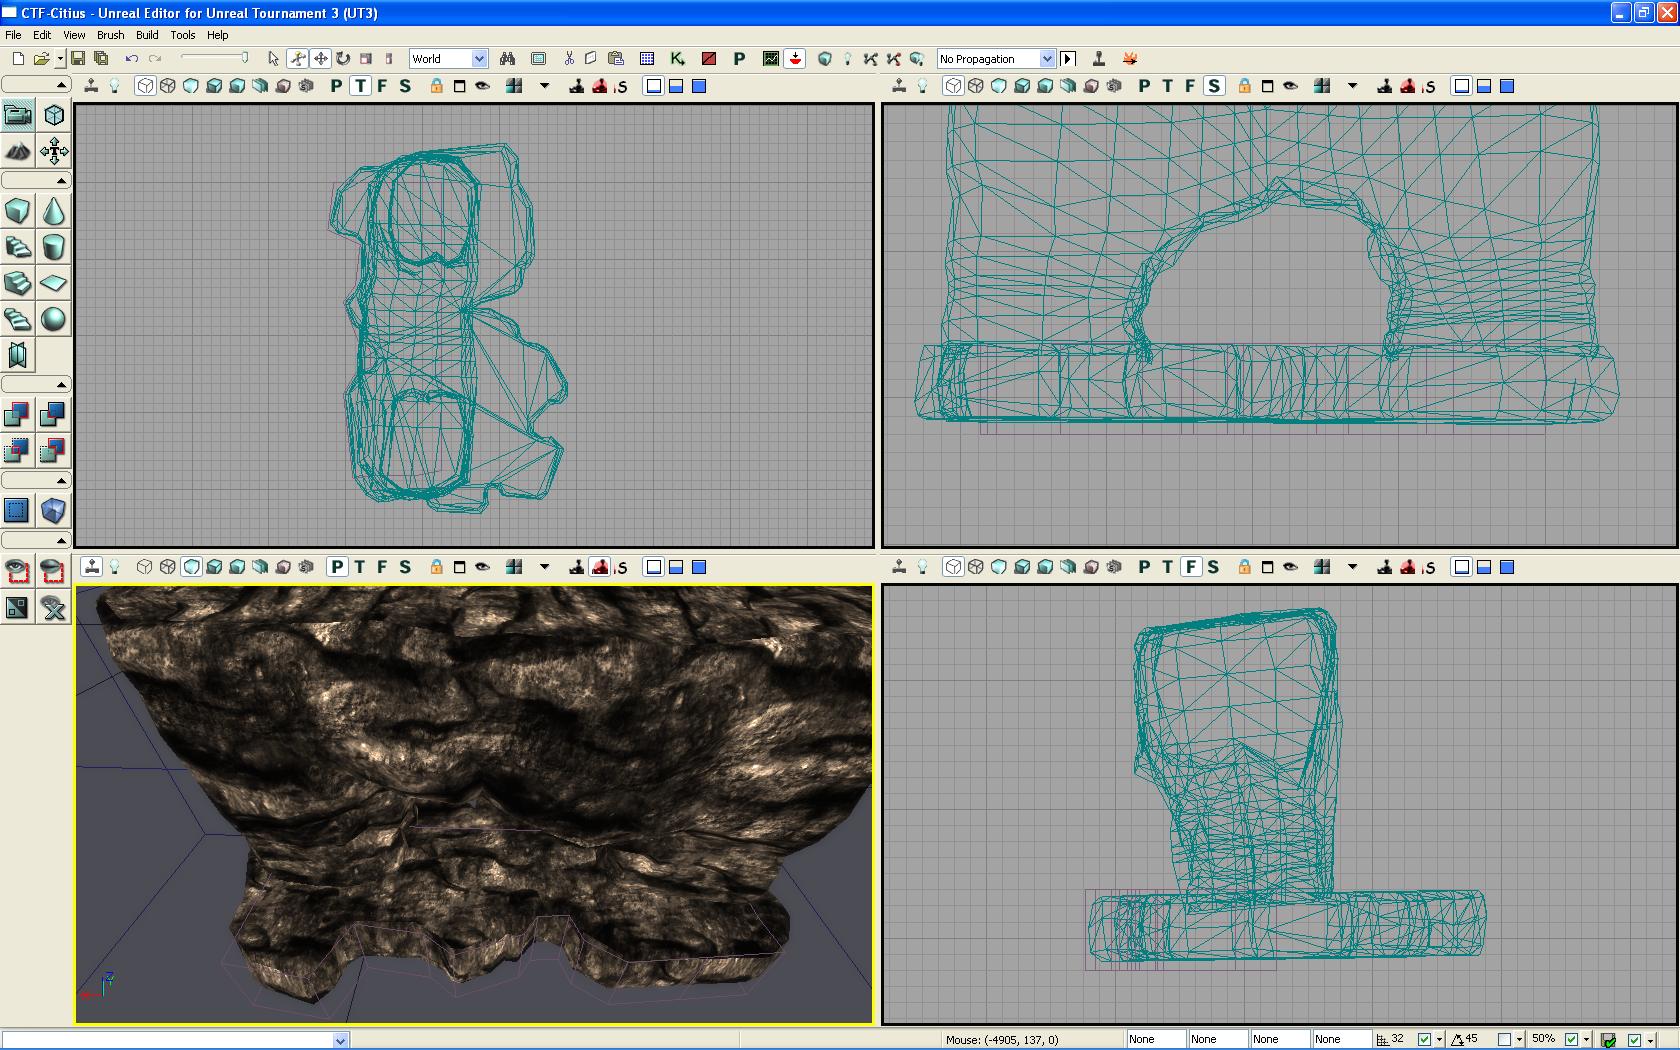
Now both pics was taken from my CTF-Citius map to provide a real example in a playable level in unlit mode :
An advice about BV is that leave them the most simple as possible, the less vertex the better. It doesn’t matter if the BV is a bit above &/or below the SM because while playing, players simply can’t notice it (except if you put the BV 32 UU’s above the SM of course 😉
Hope it help & if this as help you enhance your map, I’ll be happy you let me know 😀

Now that I have joined the WP community, I will start leaving more comments. I posted this on my site and will check it out later. Thanks for the new tutorial.
LikeLike
Thats very useful knowledge, and saves me having to learn how to do that in a 3D package. I’m sure I’ll put this to practice very soon, many thanks! 😉
LikeLike
Achernar,
You should also check out the static mesh editor as it has the ability to create collision models. This might be quicker for custom models and any mesh you duplicate.
Stevelois’ tutorials is needed for a bunch of meshes in your map as well.
LikeLike
@Odedge
Welcome to WP my friend 😀 I’m looking forward your comments as always 😉 Also, THX for the pub at your place Jeff 😀
@Achernar
This tutorial was base for a particular use which is the best method imho for your DM-Richter map.
You can indeed generate a BV from a SM & also build your own SM collision model withing the SM editor after you duplicate the SM it in your map.
I’m happy to share this knowledge with ya & all others who appreciate my tutorials since I know it is helpful & that my time for making this tut isn’t wasted 😉
LikeLike
@Odedge
Thanks for the tip, I’ll look into SM editor. Stevelois has directed my attention to partially submerged rock mesh. Can you help find the others that you noticed.
@Stevelois
I’ll look into that. Your help is greatly appreciated 🙂
LikeLike